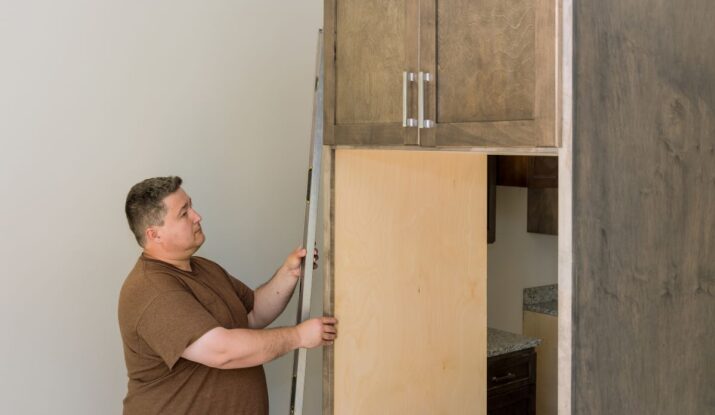
Have you seen a crack in the door of your kitchen cabinet? No need to panic! Cabinet doors tend to crack because of multiple reasons, such as forceful door slamming and natural aging processes as well as temperature changes. You may wonder how to repair cracked cabinet door. The truth is: You have the ability to fix this issue on your own.
Repairing a cracked cabinet door is simpler than you may expect. Should you ever feel trapped, Dr. Cabinet, the top cabinet installation and repair business in the United States, is always available to help. Their staff can make your cabinets seem brand new.
Repairing a cracked cabinet door will be covered in this blog post, along with easy, step-by-step directions. We will also explain how to avoid future cracks. This blog post is for you, whether you want to do it yourself or engage a professional such as Dr. Cabinet. If you want to know how to repair cracked cabinet door, keep reading.
What Causes Cracked Cabinet Doors?
Knowing why cracks develop helps you to fix them more effectively. Some typical justifications are as follows:
Old Age: Over time, wood dries out and fractures.
Moisture: Water damage can make the wood swell and split.
Weather variations cause the wood to swell and contract.
Accidents: Bumping or slamming doors can cause cracks.
Loose Screws or Hinges: A door not correctly fastened might cause strain and fractures.
Understanding the cause will help you to know how to stop future cracks.
Evaluating the Crack in Kitchen Cabinets
The first step is to check how bad the crack is. This is necessary to repair damaged kitchen cabinets properly. Here’s what to look for:
Is the crack small or large?
Small cracks can be fixed easily. Big cracks might need extra work.
Is the door still strong?
If the door feels weak or wobbly, you may need professional help.
Any loose hinge screws?
Check if the crack is near a hinge or screw hole. You might need to fix that too.
If the crack is too big or the door is falling apart, it’s better to call Dr. Cabinet for professional repair.
Tools and Materials You Will Need
- Begin by collecting all required tools and materials. Here’s your checklist:
- Wood glue
- Wood filler or epoxy
- Putty knife
- Sandpaper (120-grit and 220-grit)
- Clamps
- Clean cloth
- Razor blade or utility knife
- Paint or wood stain (to match your cabinet color)
- Small paintbrush
- Screwdriver (if you need to remove the door)
Organizing these materials upfront will help your repair process run efficiently. Any hardware store carries these necessary tools if you do not have them at home.
Step-by-Step: How to Repair Cracked Cabinet Door
-
Clean the Area
A damp cloth should be used to clean the cracked area before removing surface dust and dirt and grease. Let it dry completely.
-
Remove Loose Wood
A razor blade should be used to remove wood chips that float free from the crack area. Take care to avoid enlarging the current size of the crack and keep the same size.
-
Apply Wood Glue
Small cracks require you to open the separation with your fingers while adding wood glue into the space. A toothpick or small brush should be used to drive the glue into deep spaces.
-
Clamp the Door
Apply clamps to maintain contact between the crack pieces after you have added the wood glue. Apply moderate clamp pressure since excessive force might harm the door further.
-
Fill the Crack (If Needed)
Large cracks will need wood filler or epoxy for filling purposes. Apply the putty knife to spread filler material across the crack area. Read and follow all steps on the filler package before allowing the material to reach complete dryness.
-
Sand the Area
After the drying process completes you must use 120-grit sandpaper to sand the repaired area. Finish the surface using 220-grit sandpaper.
Need professional help? Call Dr. Cabinet – USA’s #1 Cabinet Repair Service
Reattaching the Cabinet Frame with the Door
If you removed the door to fix the crack, it’s time to put it back.
Check the Hinges:
Look at the screws and hinges. Make sure they are not loose or damaged.
Clean the Frame:
Wipe the cabinet frame where the door will attach. This helps the door fit better.
Attach the Door:
Reinstall the door to the frame by using a screwdriver. Check that the door remains straight while being tight in its installation.
Test the Door:
Open and close the door a few times. It should close properly without wobbling.
Loose hinges or improper door closure requires tightening screws or adjusting hinges to solve the issue.
Refinishing the Cabinet Door
Now that the crack is fixed, you want the door to look like new.
Choose a Finish:
Pick a paint, stain, or clear coat that matches your cabinet’s color.
Apply the Finish:
A small paintbrush should be used to apply paint over the damaged section. Make sure you wait until the filler material becomes dry with a smooth surface before starting your painting work.
Let it Dry:
The paint or stain needs full drying time before moving on. A second coat application might be necessary to achieve the perfect match with the existing color.
Add a Clear Coat:
Additional shine and protection can be obtained by applying a clear coat when the paint has dried.
Pro Tip:
Dr. Cabinet will provide beautiful refinishing services to achieve professional-level perfection for your cabinets.
Common Cabinet Problems & Solutions
Cracks aren’t the only problems your cabinets may face. Here are other common issues:
| Problem | Solution |
| Scratches & Nicks | Use a wood repair marker or filler. |
| Loose Hinges | Tighten screws or replace them. |
| Stripped Screw Holes | Fill with wood filler and re-drill. |
| Water Damage | Dry the area, sand, and repaint or call a pro. |
| Dents due to heavy objects | Fill with wood filler and sand smooth. |
Remember: If the damage looks serious, professional help from Dr. Cabinet is always the best option.
Preventing Further Damage
Here are some best ways to stop cracks from happening again:
Close Doors Gently:
Don’t slam the cabinet doors.
Keep Cabinets Dry:
Wipe away water and spills quickly.
Clean Regularly:
Use a soft cloth and mild cleaner with warm water. Avoid harsh chemicals.
Use Handles or Knobs:
This helps prevent fingerprints and wear.
Check Hinges:
Tighten screws and fix loose parts right away.
Taking care of your cabinets will keep them looking great for many years.
DIY vs. Professional Cabinet Repair
You can fix small cracks yourself with the steps in this guide. But sometimes, it’s better to let an expert handle the job. Here’s when you should call Dr. Cabinet:
The crack is too large.
The cabinet door is broken or falling apart.
You have high-end or custom cabinets.
You want a perfect, professional finish.
Dr. Cabinet is the most trusted name in cabinet repair and installation across the USA. Their expert team can fix any crack, scratch, or dent and make your cabinets look brand new.
Conclusion + CTA
Repairing a broken cabinet door requires no complicated procedures. This guide provides straightforward instructions on how to repair cracked cabinet door while bringing back the kitchen’s great appearance. But if you want the job done perfectly without the hassle, contact Dr. Cabinet — the best cabinet repair and installation company in the USA.
Call Dr. Cabinet today for a free estimate and bring your cabinets back to life!
FAQs
What steps should I follow to repair a crack appearing on my cabinet door?
First clean the crack before applying wood glue while clamping the door and using wood filler to fix major cracks. Then sand and paint.
Can a cracked cabinet door be repaired without replacing it?
Yes! The majority of door cracks require only repair work instead of demanding a complete door replacement.
What material provides the best solution for fixing cabinet fractures?
Wood filler or epoxy provide the best solution for repairing big cracks.
What is the timeframe to mend a cracked cabinet door?
Repairing a cabinet door requires 1-2 hours of work time and additional drying hours.
When should I get professional help?
If the crack is large, the door is weak, or you want a perfect finish, call Dr. Cabinet.


